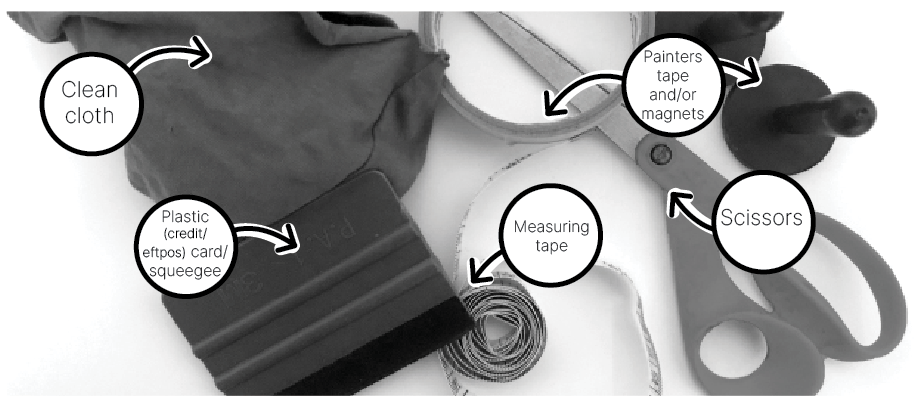
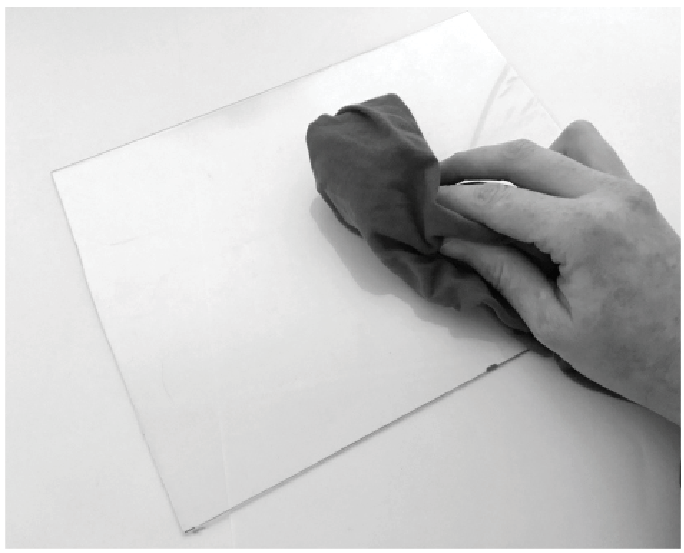
Most 4am Studio decals come in three layers (depending on your design);

  1. A white (sometimes blue) paper backing,
  2. The decal itself, and on most decals
  3. A semi opaque sticky transfer paper on the top of the decal.

WHAT YOU WILL NEED (dependent on surface area):

1. CLEAN

Clean the application surface area (IE. wall) with a dry cloth. It is important to make sure the surface is free of dirt, dust and moisture.

Vehicles: Clean the vehicle to remove all dust, grime, wax or oil, before leaving the vehicle to dry thoroughly.
DO NOT use a wax cleaner as this reduces the adhesion of the vinyl and will need to be removed prior to installing your graphics.
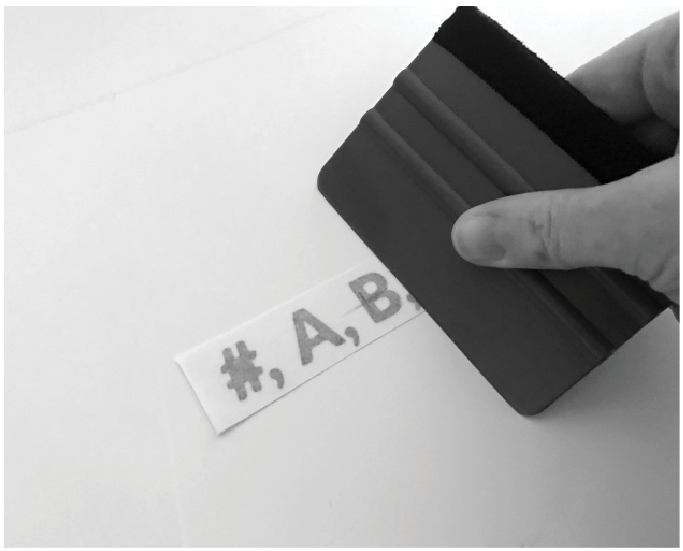
2. STRENGTHEN

Lay the decal on a flat surface, such as a table or work bench (free from dust). Use your squeegee or plastic card to rub firmly any bubbles and strengthen the bond between the transfer tape and the decal/graphic.

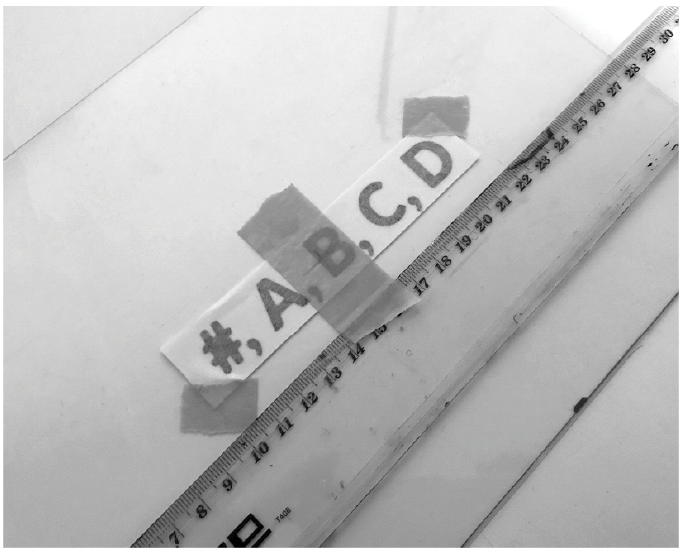
3. MEASURE & PLACEMENT

Align your decal on the surface area. Use a level and tape measure or ruler to get your decal as straight as possible. Tape the corners of the decal to the wall with painter’s tape.

Vehicles: Measure up the spacing according to the plans provided by the designer and reposition the image if necessary. Each different vehicle will need custom adjustments made. Temporarily hold the decals onto the vehicle by magnets to keep them in place and allow for modification. Once a final position is decided, the graphics can be taped into place.

For small surface areas, after measuring and placement has been confirmed simply remove backing paper from decal and skip forward to APPLY step.
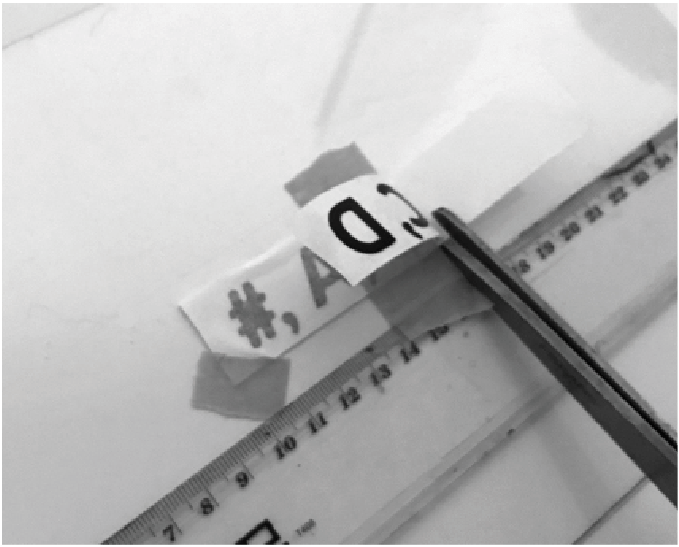
4. TAPE

Depending on the size of your decal for general surface area, tape the decal to the wall/surface with a strip of painter’s tape across/down the middle. Remove the tape pieces from the corners of ONE side.

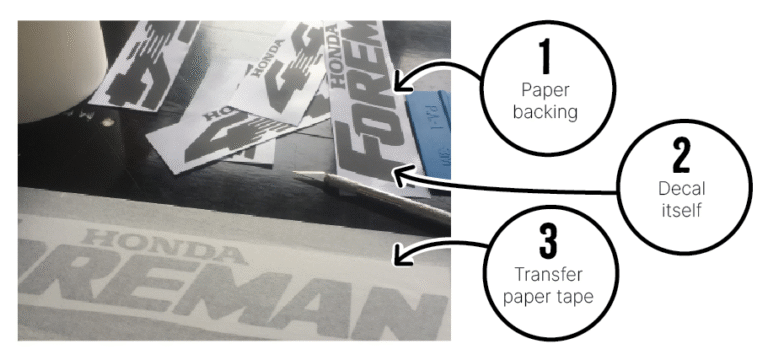
5. BACKING PAPER REMOVAL OPTIONS

One) Peel back ONE side of the application/transfer tape from the white backing sheet, ensuring the decal sticks to the application/transfer tape. Using scissors, carefully cut away the side of the white backing paper that is revealed.

Two) Remove backing paper/sheet bit by bit, during application.

Three) For small decals you can remove backing paper/sheet after placement has been confirmed.
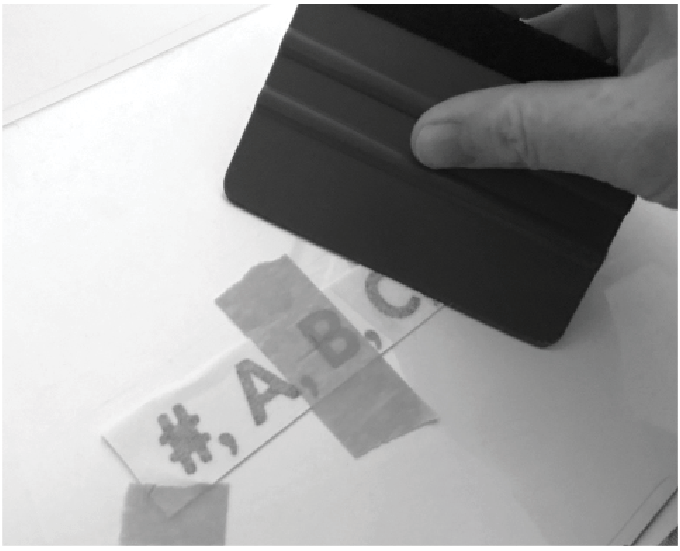
6. APPLY

Working from the middle of the image then outward to the edges, use your hand to smooth the side of the transfer tape so it adheres to the wall/surface area. Be sure to avoid bubbles and wrinkles.

Using your plastic card/squeegee, firmly rub across the side of the vinyl graphic/decal. This will remove any air bubbles and help the adhesion of the decal with the wall/surface area.

Remove strip of painter’s tape. Pull the remaining backing paper/tape from the back of the decal and smooth the decal down with your hands as you go. Be sure to avoid bubbles and wrinkles. Repeat apply step and use your plastic card/squeegee to firmly rub across the entire vinyl graphic/decal.

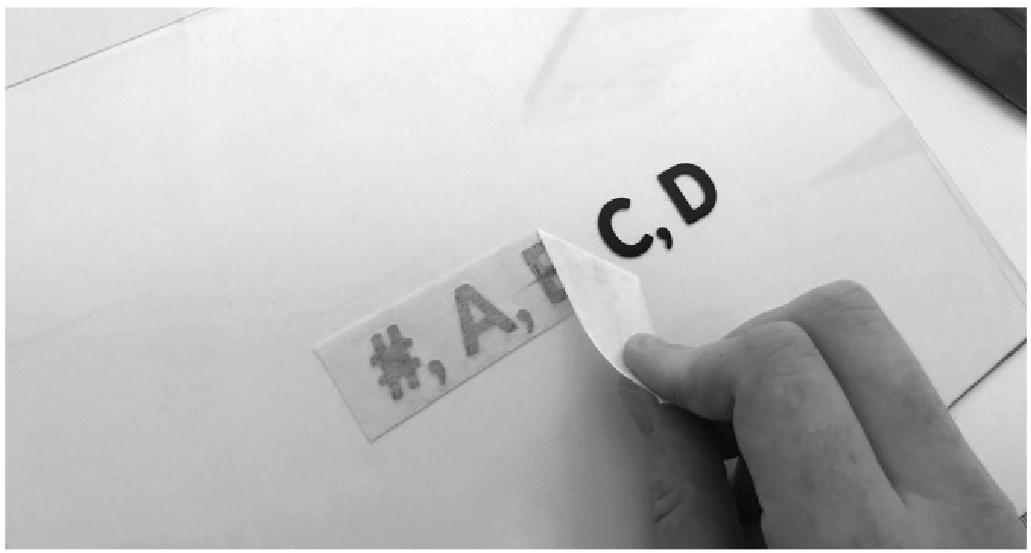
7. REMOVE APPLICATION PAPER/TAPE

Once the decal is in place securely, start with a corner of application tape and working diagonally, carefully pull the application/transfer paper/tape from the surface area/vehicle and vinyl decal , ensuring that all the parts of the decals adhere to the surface area.

8. FINISH

If the decal runs over two panels, the vinyl can be cut once the entire graphic has been placed. In this case, the vinyl should be cut flush with the edge of each panel which will mean making two careful incisions on either side, taking extreme care not to cut or damage the vehicle or surface area.

Use a clean cloth and rub over the decal to remove any air bubbles that might remain.

You can use a small pin to poke any remaining air bubbles if necessary.

Congratulations on your newly applied decals!

! Decals should be applied indoors at temperatures ranging between 10-32 degrees Celsius (optimum temperature of
20-25 degrees).

! If your surface application area has been freshly painted, please allow the paint to cure before applying decals.

CLEAN & MAINTAIN

Vehicles: 
  • Do not wash the vehicle for 48 hours after installation to allow time for the adhesive to fully cure. 
  • Touch-less car washes are the best for graphics care. 
  • Whenever possible, store in a garage or at least in a shaded area during the day. 
  • Hand wash with a wet, non-abrasive detergent. Rinse thoroughly with clean water.
  • To reduce water spotting, immediately use a silicone squeegee to remove water and finish with a clean microfiber cloth. 
  • Fuel Spills should be wiped off immediately to avoid degrading the vinyl and adhesive.
  • Do not use any polishing or wax products on matte or textured films. 
For all other surfaces:
  • The easiest way to clean a vinyl decal is to wipe over the surface using a clean damp cloth and only if necessary, hand clean. 
  • Hand clean by rinsing the graphic with clean water, removing any loose dirt or contaminants carefully. 
  • Use a soft cloth or a synthetic natural sponge or mitt and avoid a scrub brush or scotch bright pad or anything scratchy. 
  • Gently wipe the surface from front to back, starting from the top and working down. If using soapy water always rinse the sponge in the clean water before soaking in the soapy water in between sections. 
  • Allow the water to dry naturally or dab dry with a microfiber or soft non-abrasive towel, being careful not to lift film edges.
  • Solvent or abrasive cleaning agents may damage graphics.

Important note: We recommend placing decals out of reach of your baby’s cot, or where your child will be able to reach. If your child is able to remove the decal from the wall or any surface area, this has potential to become a choking hazard. Removal of your decals must be done SLOWLY, so as to not damage your surface areas.

It is recommend to wait at least 4-6 weeks after painting walls or vehicles, before applying decals to allow the paint to cure. We do not recommend the use of wall decals if gloss or semi-gloss paints, wash and wear, Teflon and silicone paints have been used or if an undercoat has not been used prior to the application of the paint. Walls should have been painted according to manufacturers instructions so as to not risk damage.

Most 4am Studio decals are intended for the one-time (short to medium term) use on vehicles or similar surface areas (flat smooth surfaces), are waterproof* and intended and suitable for indoor and outdoor use with limitations.

If your intended use for the decals are for temporary wall graphics or other surfaces please let us know so we can alternate vinyl type.

Do not over-handle the decals; each time you touch the adhesive you could be reducing the effectiveness. For other surface areas such as home ware products (glass, ceramics, plastic etc.) hand washing is recommended. Application is not suitable for the microwave, dishwasher or high temperatures. Instructions covered in this document are a guide only. Watercraft and boat applications: we do not recommend applying decals below the water line

We are unable to refund, provide warranty or guarantee that the decals you purchase will adhere to your walls, surface areas or vehicles as often this comes down to user application, conditions in which they are applied or surface type/quality and not the vinyl itself. The lifespan of vinyl can vary, depending on how well it’s maintained over the years, the brand, type and external conditions.

For best results on application, contact a professional sign-writer in your local area.

location

Luggate, Central Otago
New Zealand

HOW TO

Decal Application
Apparel Care
Decals vs Printed (digital) Stickers

© 2025 All Rights Reserved by Alana Moffatt | 4am Studio.

error: Content is protected !!